Monday, October 18, 2010

From freezer to oven: Homemade Lasagna


Last week, I tempted many of you with a photo from a past dinner I'd made. I do promise to share that recipe, but that's not what I ended up making and photographing step-by-step on Thursday. Instead, I whipped up two of my homemade lasagnas, which are equally delicious (even if not quite as decadent). I am a huge fan of cooking once and enjoying the fruits of my labor many nights. This answers the burning question many of you had after watching the enchilada video, of whether I cook meals like that every night?

Really, who has time to cook each and every night? I certainly don't, but I do want to give my family wholesome, amazing meals each night so I cook like this. When I had my personal chef business, cooking once and freezing was the model on which this wildly successful business was based. I'd go into a family's kitchen, cook 5 entrees and stock their freezer with these homemade meals that they would then enjoy on the busiest of days. This know-how has particularly come in handy on Mondays, which is always my busiest day of the week.

Homemade (Turkey, Beef, Vegetarian, You-Name-It) Lasagna
The recipe I am sharing today is a turkey lasagna I made with what I happened to have on hand last Thursday, but once you get the consistency/layering order down, you can alter the recipe with whatever your favorite fillings may be...
Makes two 6-serving (or more smaller) lasagnas which freeze perfectly

1 or 2 onions, chopped
1 lb ground turkey
pinch of Herbs de Provence (always on hand)
1 lb cherry tomatoes
2 lbs fresh spinach
3 or 4 zucchini, thinly sliced
1 lb tub cottage cheese or ricotta cheese
2 jars tomato sauce of your choice
1 tube sun-dried tomato paste (which I always have in my pantry)
mozzarella, sliced
Parmesan, shredded
oven-ready lasagna sheets

Saute the onion, ground turkey, herbs and tomatoes. Add spinach and cover so the spinach wilts. Once meat is cooked through, set this mixture aside. Now it's simply assembly with the other ingredients. (I always make my lasagnas in a freezer and oven-proof baking dish so I have the option to freeze it.) First, pour a bit of sauce in the bottom of each baking dish. Alternate layers of pasta, meat, veggies and cheese ending with a layer of sauce and cheese on top. At this point, you can either bake the lasagna at 350 for 1 hour, or pop an airtight lid on the dish and freeze it uncooked. When ready to bake the frozen lasagna, simply place the uncooked lasagna in the oven while preheating it to 350, then bake for 1 1/2 to 2 hours, until warmed through.

Here are the step-by-step photos of the lasagna I made last week:

I sauteed the onions, turkey, herbs and tomatoes (top photo), then when the turkey was cooked through, I added the spinach and covered the pan so it wilted. (I had to do this in 3 batches since fresh spinach is so bulky.)

While I can't always be so organized, with something like lasagna, having your ingredients ready to go will make assembly quick and easy: lasagna sheets, zucchini is sliced, mozzarella is sliced, sauce, cottage cheese (since we prefer that to ricotta), tomato sauce and tomato paste are all ready to go...layering is a great way for kids to help make this meal.

Sauce goes down first, so nothing sticks. Then the first layer of pasta. Don't worry if the pasta doesn't reach the edges of the pan. With the next pasta layer just stagger it so the corners that didn't have pasta last time, so this next time...

Then I put a layer of cottage cheese over the pasta sheets, and let my son squirt sun-dried tomato paste on top of that...

...followed by a layer of zucchini...

...a few spoonfuls of sauce...

and another layer of pasta. In terms of what goes on what layer, you just want to make sure the dry pasta is buffered by a sauce or liquid. This is how it cooks.

Then, a nice hearty layer of the turkey, herb, tomato, onion, spinach mixture...

and one last layer of pasta.

Then more sauce, some shredded mozzarella (clearly put on my my 3-year-old) and

a few handfuls of shredded Parmesan. Done! How easy was that? Now you can enjoy one tonight, and pop the other into the freezer. The one you're cooking tonight will bake for 1 hour at 350 degrees. The one you're freezing (uncooked) will need to bake for about 1 1/2 to 2 hours at 350. I do not thaw the lasagna before baking, simply pop the frozen dish in when I am preheating the oven and then set the timer once the oven temp gets up to 350. So easy, and so delicious. Enjoy!

Thursday, October 14, 2010

A run on enchilada sauce in Fairfield County...

"The enchiladas were amazing!!!!!!!!!!!!!!! We were literally licking the dish! Thanks! Will definitely make it again! Awesome!"

"I made this tonight for dinner. It's absolutely fabulous! Thank you!"

"...I just watched... we are a GF [gluten free] family so the corn tortillas make this a dish I will make all winter for our weekends. We drive every weekend to Killington and constantly have dinner parties. Keep the links coming. This is fantastic!"

"Wow, congratulations!!!! You look great and make it all seem so easy!"

Rumor has it that there's been a run on enchilada sauce in Fairfield County this week. Is it true that our local market is out of sauce?!!! If you haven't had a chance to see my chicken enchilada video, click here and see what all the excitement is about. Yes, you too, can whip this crowd-pleasing meal up so easily!

Now that you are back in the kitchen, a few of you have asked for a second dish, similar in prep. I don't have another fabulous video for the meal I plan to make after the kids get home from school (pictured above) but I will take step-by-step photos and share them with you this evening...

Monday, October 11, 2010

Take Two: Let's try that again...

Little snafu posting the earlier video. Some of you told me you couldn't access it. Sorry about that! Clearly, I am much better at cooking than this technological stuff. For those who had trouble viewing it, simply click here for a direct link to my first cooking video. And, once I catch another little bit of downtime this week, I will try to get the video to fit a little better within the square screen below too. (It must just be destined for a very big, wide screen-- ha.)

Can't wait to hear what you think!

I'm a movie star...well, sort of. Here's to my first cooking video!

I know most of you moms out there are probably spinning at this point in your children's day off of school. So, feel free to pour yourself a glass of something delicious and settle in for a few minutes of entertainment! While I don't love seeing myself on film, I have to admit that this little project I am working on with Chad over at DBG has me excited. Here's the first video we shot. I'd love to hear what you think...

Sunday, October 10, 2010

Eating Together - The New York Times Food Issue

The New York Times' magazine is themed Eating Together this week. To say I am excited would be an understatement. If it's not waiting in your driveway this brisk morning, run out and buy a copy so we can read it together. Here is a peek at the first article.

Thursday, October 7, 2010

Another one of my go-to recipes: Jam Filled Scones

My dear friend, Leslie, tried to teach me this mantra about saying "no". Clearly it went in one ear and out the other, because when my son's art teacher asked if any parent would like to bring snack for today's special after school class I jumped at the chance. And that is why I found myself baking scones this morning, while making breakfast, packing a lunch, cleaning up for the cleaning ladies and cursing the broken washing machine. But then the kitchen was filled with this amazing aroma, and my kids were recollecting how much they love these scones, and it was definitely all worth it. So, about these scones... I can't believe I haven't shared this recipe. This is another one of my go-to recipes. Originally learned from Giada, this is my version that is plenty for a classroom, with a few extra for fellow teachers:

Homemade Jam-Filled Scones with Lemon Glaze
(Makes 28 scones)
4 cups all-purpose flour
1 cup sugar
4 teaspoons baking powder
1/2 teaspoon salt (optional)
12 Tablespoons butter (1 1/2 sticks, cut into 1/2" pieces)
2 cups heavy cream
lemon zest (optional)
Jam (I tend to use strawberry or raspberry)
For the glaze:
1/4 cup lemon juice
1 1/2 cups powdered sugar
vanilla (optional)

Preheat the oven to 375. In a Cuisinart, pulse the flour, sugar and baking powder until combined. Add the chilled butter and pulse until it's the consistency of coarse meal. Add the cream and pulse, scraping down the sides of the bowl. Transfer dough to counter, divide in half and roll the first half of the dough to 1/4" thick. Using a cookie cutter, cut into desired shape and place scones on parchment lined baking sheet. Make a small indentation in the center of each scone with your thumb or a spoon, and fill with a dollop of jam. Roll the remaining dough, cut into same shape and place a second scone on top of each one. Gently press down the top scone down on the bottom one. Bake for 20 minutes, or until golden brown. Let cool for 30 minutes, then top with glaze.

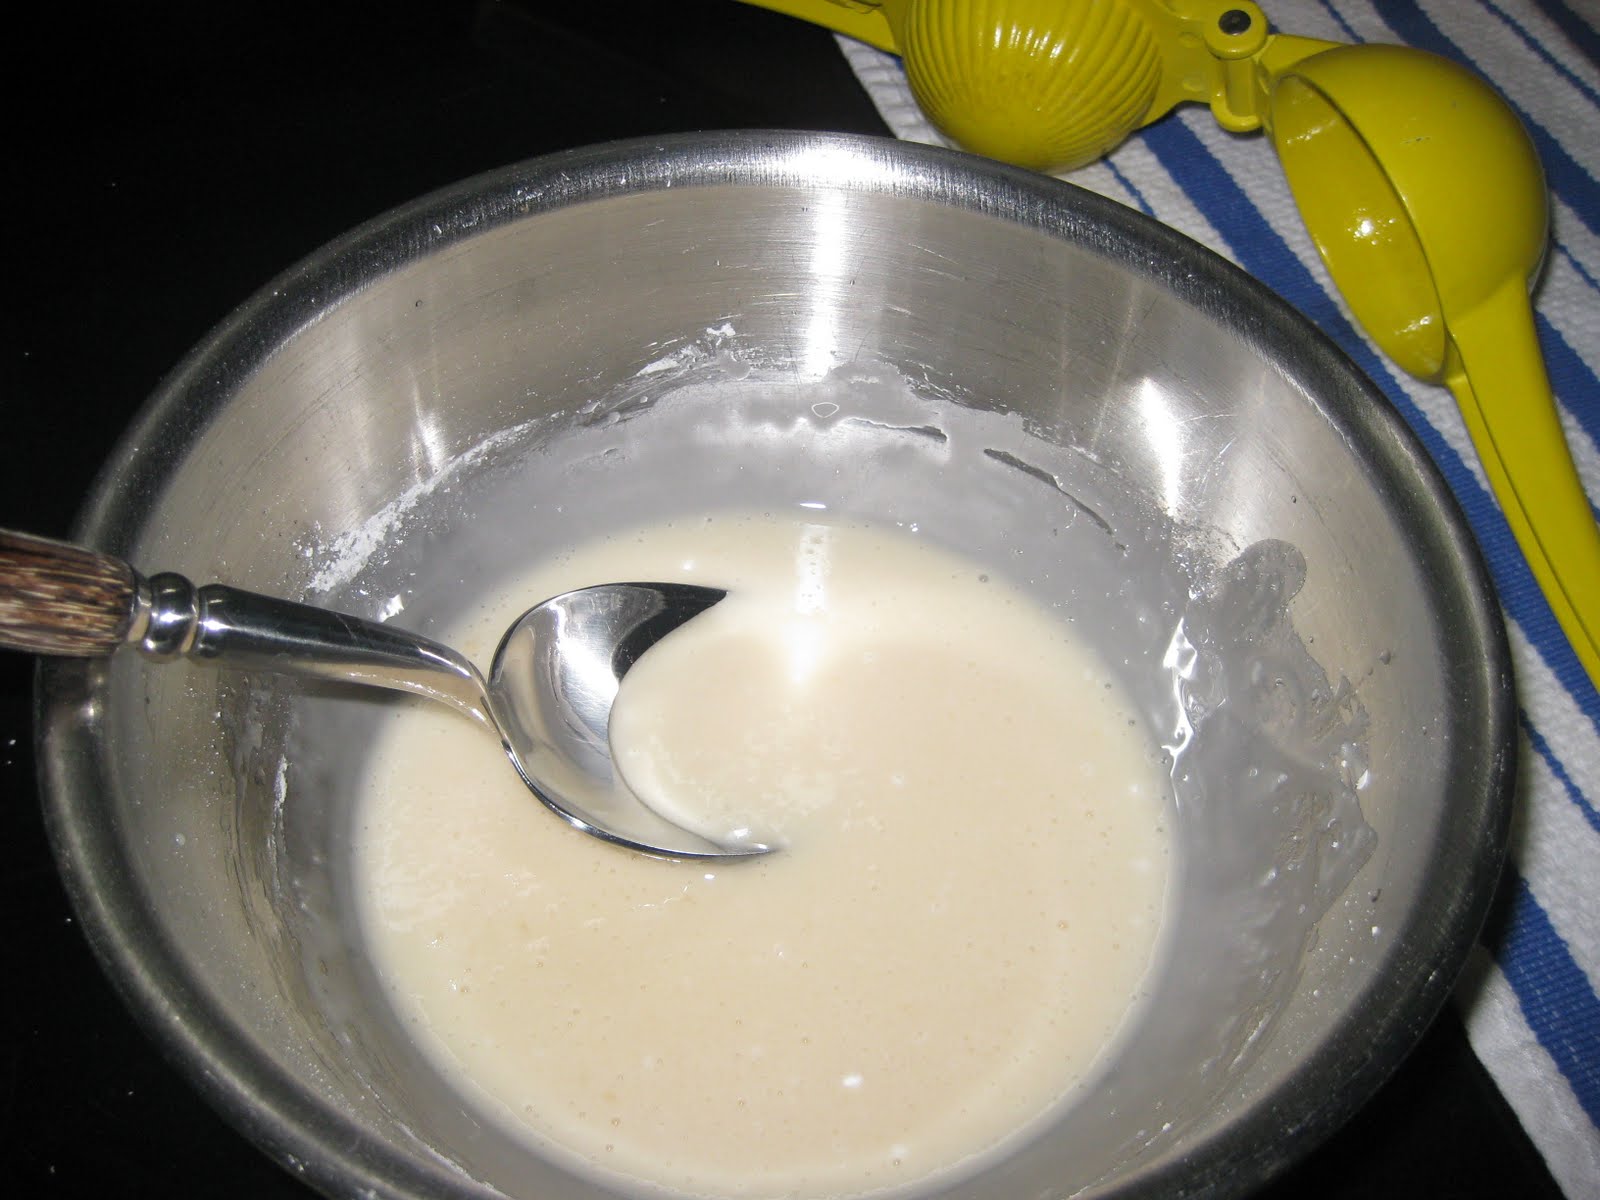
To make the glaze: simply whisk the powdered sugar and lemon juice until smooth. You want it thin enough to drizzle with a spoon, but not too watery. Add more powdered sugar, if necessary. Let the glaze set for about 30 minutes.

Here is the recipe in photos...

I've already combined the dry ingredients (in the photo up top), now I should have pulsed it to make a coarse meal with the butter...

but I hadn't had my coffee yet, and so I let my little one pour the cream in next and I grated some fresh lemon zest in there, and then I tried to pulse. The Cuisinart wasn't happy, grinding with all its' might to make the dough.

I didn't want to make the machine smoke, so I turned the dough out onto the counter

and rolled it to 1/4" thick. My three-year-old pointed out that there were big polka-dots of butter in the dough. Can't worry about that at this point!

Here are the bottom layers of the scones.

Add a dollop of jam (this morning we went with raspberry).

A second 1/2" scone was placed on top of each one, and I gently pressed down so the jam would stay inside. Then into the oven for 20 minutes. Now they're cooling while I put my older son on the bus and try not to freak out that the clean playroom is covered in Legos again.

Next a quick glaze. Simply: lemon juice, powdered sugar and a splash of vanilla whisked together.

Not too thick, not too thin. A large spoon works well for drizzling.

Drizzling the glaze on while the scones are still on the rimmed baking sheet, and on parchment makes clean-up simple.

Then transfer the scones to a wire rack so they can cool completely and the glaze can harden before transporting them to school.

Wednesday, October 6, 2010

Whipping up Pea Dip while waiting for the repairman...

The washing machine repairman was supposed to come between 8am and noon. I'll let you guess when he came. One upside of feeling like a caged animal on the first non-rainy day in what seems like too many, is that I crossed a few things off my to-do list, including making an appetizer for book club tonight. (Holy run on sentence!!)

Most of my mom friend reading this are thinking (with a smile), "ah right 'book club'". Oh, how I love my book clubs (yes, plural)-- a child-free night, a glass or two of something delicious, some smart conversation, and always some lovely nibbles that we pass off as dinner since no one cares if there's a meat and two veggies when we're at book club.

Anyway, the point of this post is not what I whipped up, but in general having a few go-to recipes up your sleeve. If you have some go to's then making an appetizer, or dinner, on the fly is totally doable.

Based upon what I had on hand this morning, I made my (super easy and always crowd-pleasing) pea dip with frozen peas, parmesan, pine nuts and some fresh mint. Pair the bright green dip with pita chips and I'm ready to go. My other go-to appetizer? Those of you who have been reading a while know that it's filling little phyllo shells with something special be it pestos or Feta and figs, to name just two of the many options. I love trying new recipes out, but it's comforting to have a handful of tried and true ones that I can make with my eyes closed.

p.s. As an added bonus for getting the dip made early in the day, my kids enjoyed a fabulous after school snack.

Tuesday, September 28, 2010

By popular request: Re-post of the Blueberry Muffin Recipe


Two posts before dinner, after not getting to post in almost a month. I'm on a roll now. A few of you have asked me for the recipe for the muffins that were served for snack today. That was a triple batch of this recipe . I did have yogurt on hand this time, so I used yogurt instead of sour cream. And, since blueberry season has passed in CT, I thawed organic berries overnight and used them with equally delicious results.

Meatless Meal Idea: Black & Pinto Bean Cakes with Feta


Whoa, time to play catch up. My friends' comments that my postings have been few and far between have gotten less subtle. Apparently, while we can all do recipe searches online, many of you are waiting for me to cull through the clutter and test the recipes on my own kiddos, passing along those that everyone likes-- and that we can all quickly whip up. Lucky for you, everyone's (finally) healthy and back to school as of today. I am doing a little happy dance right now, but I'll spare you the visual. I do, however, have some cooking videos (from this winter when the film crew was here) that I will be sharing once I have a moment to work out the technological side of things.

In the meantime, let me share a good recipe...or two or three.

I know a few of you are trying to incorporate more meatless meals into your family dinners. Here's one that I recently made that was a total hit:

Black & Pinto Bean Cakes

1 onion, diced
olive oil
two 15-ounce can black beans, rinsed and drained
1 15-ounce can pinto beans, rinsed and drained
1 tub crumbled Feta
2 teaspoons ground cumin

2 teaspoons chili powder (optional, omit if you want them more mild)
2 eggs
1 cup whole wheat breadcrumbs
(maybe a little more)

Preheat oven to 350 degrees.

Saute the onion in a bit of olive oil, until tender, and set aside to cool.

Place drained pinto and black beans in large bowl. Using a potato masher (or fork if you don't have one), mash beans coarsely. (You want some left whole, and some smashed into more of a paste, so your cakes will have good overall texture.) Mix in onions, feta, garlic, cumin, chili powder, eggs and 1 cup of whole wheat breadcrumbs. Using your hands, combine all ingredients. (If necessary, add additional breadcrumbs until you get to the consistency of oatmeal cookie dough. You want the patties to hold their shape.)

Shape bean mixture into 1/2 to 3/4-inch thick patties and place them on a cookie sheet that's been lightly sprayed or rubbed with olive oil. Bake at 350 for 15-20 minutes or until warmed through and a little crispy on the outside, carefully flipping the cakes after 10 minutes.

The cakes themselves are more of a vehicle for toppings than being scrumptious on their own. I serve warm with a variety of toppings, letting each person choose their own. Here are some topping ideas:
Corn (fresh, or thawed frozen)
Cherry Tomatoes, halved

Avocado chunks
Sour cream
Guacamole
Salsa

Hot Sauce
Pickled Jalapenos
Shredded Cheese

And to answer the next burning question of whether my kids ate them too?: Absolutely! They loved them. I went light on the chili powder and heavier on cumin. Then I let them choose their toppings...and to spice mine up, I just added some extra hot sauce.

Friday, September 3, 2010

New Food Crush: Vicolo Cornmeal Pizza Crusts

I am still sick. This is outrageous. Dinners since we flew back to Connecticut have been simple. I'd rather make them than eat take-out, so I know we're eating nourishing, good food, but it would be an understatement to say I am short on energy. The first night back I made a quinoa salad with edamame, corn, tomatoes and a cilantro vinaigrette. (And I put some frozen stuffed pork dish in the oven for my husband so I didn't have to deal with "where's the beef"-- he ate the quinoa as a side, but my kids ate it as their entree...) Tonight we're having grilled fish with Whole Food's Pinapple-Mango-Jicama Salsa (found by the cut up fruit) and the quinoa as a side, and I'll probably throw some zucchini on the grill. Last night I had the kids help me make pizzas and they were a hit.

"Homemade" Pizza
Toppings of your choice (I offered up what I had on hand: a Trader Joe's package of grilled eggplant and zucchini, a ball of smoked fresh mozzarella, some jarred tomato sauce (which I let them paint on their crusts with a basting brush), a fresh zucchini, and a tube of sundried tomato paste)


Top crusts with desired toppings, then bake (on a baking sheet) at 425 for approximately 15 minutes.


*My mom introduced me to
these crusts (pictured up top, that photo is poached off of the Vicolo website) when we were out in Idaho. She simply tossed some cherry tomatoes on the crusts, added some fresh mozzarella and baked them. Then before serving, she chopped fresh basil on top of the pizzas. It couldn't have been easier, and they were delicious. You get these crusts in the frozen section and in Fairfield County, CT I know they carry them at Whole Foods. They beat making your own dough-- or even dealing with rolling store bought dough out-- because they are these perfect self-contained "canvases". The texture is hearty, and slightly crunchy. They're my new food crush.

Saturday, August 28, 2010

Down for the count

I have been down for the count. I am trying very hard not to dwell on the fact that our getaway to the mountains was crushed by illness. The view from my bedroom was nice, after all. And the kids got to spend an inordinate amount of solo time with their grandparents. But I missed all of the hiking, biking, and mountain lakes that past years' visits have highlighted. And there's a reason why people have children in their 20's, 30's, or 40's and not in the grandparent years...thankfully my parents could go to their regular yoga class this morning for a brief zen period this morning since I am slowly able to re-enter the world of the living.

And then there's the whole cooking aspect. For the past 10 days I haven't cooked. At all. See, we have this unwritten rule around here: I arrive with the kids, for a nice long visit...I cook, my dad does the dishes and my mom exposes the kids to her love of art. Then as a family we hike, and bike, and play in streams and rivers. Bliss. Unless I am down for the count.

So, as far as kitchen things are concerned, I am living vicariously through a few of my favorite blogs. Without recipes of my own this week, I share a few of my favorite posts with you:

I do not know how she does it, but nienie puts out a spread to welcome the school year that you have to find inspiring (even if you're like me and know you could never pull something this put together off).

Susanna, over at paper oranges, who always sources the most amazing things found this fabulous sectioned plate (and you all know I love those sectioned plates for my kid's meals).

While I'm not a baker, Kelsey's recipes over at Naptime Chef just might inspire me if the fruit is still great when we head back East. This plum torte and this apricot-blueberry cake both just look amazing, don't they?

And then there's City Mama's Weekly Meal Planning... which is the reminder that I really need to knock this out of my system because starting next week it's back to reality without special grandparents to help cook and take such good care of my kids!

Thursday, August 19, 2010

Super Easy Veggie Side: Grilled Carrots with Fresh Ginger


Another super easy side that pleases both the children and adults in our home.

Grilled Carrots with Ginger


carrots
fresh ginger, grated
olive oil
kosher salt
pepper
Heat the grill to medium. Lay a piece of foil on the grate (unless you own some fancy grill pan contraption that'll keep the carrots from slipping in the cracks...). Drizzle the foil with a bit of olive oil, toss the carrots on and grate some fresh ginger on top. (I use a microplane zester, which I have linked here.) Sprinkle with a bit of kosher salt and a twist or two of pepper. Cook to your desired doneness, tossing the carrots with tongs so none of them get too brown, and the fresh ginger is mixed in. Serve warm or room temp. Delicious and so easy!