Monday, August 31, 2009

Two Potluck Offerings (that use Giada's Basil Sauce)


(I replaced the photo of our vacation with the green bean one but seemed to have accidentally erased the quinoa one off my camera. So, enjoy the vacation photo instead!)

Wanted to share two potluck recipes I’ve made while on vacation, since many of you may be gearing up for Labor Day BBQs and the like. As you may remember from an earlier post, I fell in love with Giada’s Grilled Chicken with Basil Sauce that my friend, Christine, made for our Wednesday dinner swap. So, for these two potluck dishes, I simply whipped up Giada’s Basil Sauce and used it for a green bean side, and later for a quinoa salad. The sauce lasts for several days, so I double Giada’s recipe (the doubled recipe is posted below) and keep in on hand so I can use it in various ways throughout the week.

Green Beans in Giada’s Basil Sauce

Green beans, blanched
Giada’s Basil Sauce
Mixed greens (as a base)
Slivered almonds, lightly toasted
Lemon zest, for garnish


Trim the ends off the green beans, blanch them, and then toss in Giada’s Basil Sauce. I layered the platter with mixed greens, drizzled that with a little of the sauce, then put a mound of green beans, and sprinkled them with slivered almonds and lemon zest.


Quinoa Salad with Giada’s Basil Sauce

Quinoa, cooked according to package
Chicken broth (I used it to cook the quinoa, instead of water)
Feta, crumbled
Cherry tomatoes, halved (unless they’re already tiny)
Roasted Peppers, chopped
Pistachios, roasted
Basil, chiffonade
Giada’s Basil Sauce

Toss everything together, and dress with an ample amount of Giada’s Basil Sauce. Serve room temp. Will last several days in the fridge, and you can turn it into an entrée with the addition of some roasted veggies, grilled chicken or shrimp.


Note: The market out here only had one box of regular quinoa left on the shelf, so I also cooked up a second box of black quinoa (which I had never seen before). The black quinoa was costly, so I probably would just stick to the more easily found regular kind, but it sure was pretty.

Giada’s Basil Sauce is linked here, but for those who like everything in one place, I will copy the recipe below as well:

Giada’s Basil Sauce (makes about 3 cups)

2 cups olive oil
½ cup fresh lemon juice
2 cups lightly packed fresh basil leaves
4 cloves of garlic
2 teaspoons grated lemon peel
salt and pepper, to taste


Put everything in a food processor or blender, and pulse until smooth. Store in a tight fitting container, in the fridge, for up to 1 week.

Lunchboxes

As the school buses start rumbling down our streets, I wanted to pass along this packaging recommendation that will hopefully inspire you as you pack up your children’s vittles (in addition to being eco-friendly). Most of you already own an insulated lunch box of some sort. At the start of summer, I went to the Container Store and purchased a bunch of small food containers that I could mix and match for a bunch of different lunch offerings. They key is to get the containers small enough that you can fit at least 4 in the lunch box, and to have the lids easy for the children to open. Here are a couple of my favorites, with links so you can buy them online if you’d like:
Klip-It Snack Box (comes in a package of 3, and is small enough that it doesn't take up a ton of space, but it's very deep): great for bulkier things like cut up veggies (carrots, celery sticks, bell peppers slices, broccoli "trees"...), a pasta salad, crackers, pinwheel wraps or a bunch of grapes.
Small Food Keepers come in a variety of sizes, but I have 3 favorites. I recommend stocking up on two or three of the 4 oz ones per child because they are perfect for yogurt dips, hummus, little pieces of cheese, and dried or sliced fruit. Then you’ll probably want one 12.5 oz one per lunch box, as this is a square one, perfect for a sandwich, sliced chicken breast, or other large item. The 9 oz one is rectangular, so it works well for sandwiches too, but I found I used it less often. I shy away from the “divided” ones they sell because I prefer the flexibility of individual ones.

When packing a lunch, it’s helpful to keep the “rainbow” concept as a visual. Aim for at least one color per container. If you get at least 4 different colors into their lunch, chances are you’ve included a variety of foods, including fruits or veggies.
Happy packing!

Tuesday, August 25, 2009

4 Make-Ahead Breakfast Ideas for Busy School Mornings


I have no idea what my 2+ year old did with the little piece of paper I’d written notes for my next post on? As the school year starts, I promised you some make ahead breakfast ideas. But after biking around with the kids all day, finally getting two over tired little boys to bed (hours past bedtime), then sharing a bottle of wine with my mom while we read our respective books by the outdoor fireplace, I find myself re-creating the post. And given the choice of frolicking in the mountain air, or sitting at the computer typing all of this up...well, frolicking won out. But though the post is delayed a couple of days, we've got several months of school mornings ahead, so let’s get a couple of great make-ahead breakfasts into our repertoire early in the school year so that morning time goes smoothly...and deliciously.

If you have not yet tried the “Protein Pancake” recipe posted months ago, I urge you to whip a batch up. They are moist and delicious, and if you add enough vanilla and lemon zest, they don’t even need a topping. (Handy for those who are handing breakfast to the backseat in a mad dash to preschool…) Should you find yourself at a table, you can of course always do syrup, but here are a couple other ideas for toppings:
- fresh berries, or cut up nectarines, peaches, etc.
- apple sauce and a sprinkling of cinnamon
- your favorite flavor of yogurt

I am re-posting the recipe here for those who want all four of these make ahead breakfast ideas in one place:

Canyon School’s “Cosmic Cookery for Kids” Protein Pancakes

1 lb cottage cheese (1 tub)
6-8 eggs
1/2 cup flour
2 t vanilla (or more)
dash of cinnamon
lemon zest (optional)
butter (optional, for fry pan)


Blend everything in the blender until the batter is smooth with a consistency of sour cream. Bake small pancakes on hot griddle, turning once. Serve warm. These pancakes may be made ahead, cooled, and stored in a Tupperware in the fridge for several days. They reheat beautifully.

My kids really like my mom’s oatmeal, which I always avoided making because who has the time to cook it in the mornings (never mind then cooling it down, since my children like their food room temp, not warm thank you very much...)? But now that I know the trick, I will avoid those little microwave packets at all costs! This is so easy to prepare the night before, and so much healthier.

Meme’s Oatmeal

4 cups water
1 cup McCann’s Irish Steel Cut Oats*

1 cup dried cranberries or raisins (optional)

If you are including them, add the cup of dried cranberries (or raisins) to 4 cups of water. Bring to a boil. Once the water is boiling, add 1 cup of McCann’s Irish Steel Cut Oats. Simmer the oats for 1 minute, give it a stir, then place a tight fitting lid on the pot, turn the heat off and go to bed. In the morning, you will have a pot of oatmeal ready to reheat on the stovetop, which will only take a couple of minutes (add a bit of water if it is too thick). Or you can always heat up individual portions in a microwave, if you prefer that route.
For children who need a little prodding to enjoy this, offer up a “toppings bar” and let them doctor up their own bowl. Some ideas: honey; maple syrup; fresh berries or chopped fruit (blueberries and peaches are favorites over here); cinnamon; raisins; dried cranberries

*start with the real stuff—Traditional Steel Cut Oats—which all major supermarkets should carry. It comes in a 28 oz metal can, pictured above.

At least once a week, I heat up a slice of a frittata for the kids. Either on Saturday or Sunday morning I’ll make a big one, and then I store the extras in the fridge for a quick, healthy breakfast during the week.


Basic Frittata

2 cups of your choice of meats and/or vegetables**
9 eggs
½ cup of milk (preferably whole milk)
½ cup any type of shredded or finely chopped cheese (Parmesan, mozzarella, cheddar, gouda, Dubliner, Feta…)
+ another ½ cup of shredded cheese to go on top


Preheat the oven to 350.

In a mixing bowl, whisk together eggs, milk, and your choice of cheese. Set aside.Sauté your choice of vegetables and/or meat in a bit of olive oil in an oven-proof medium-sized skillet, until tender. Spread this veggie/meat mixture evenly on bottom of skillet. Pour egg mixture over it, using a spatula to lift up the “filling” along the sides of the pan to let egg mixture flow underneath.
When the mixture is about half set, sprinkle the remaining cheese over the top of the frittata and put the skillet in the oven. Bake for 15-20 minutes, until frittata is puffy and golden. Remove from oven and let cool on the counter for several minutes. You may serve it directly out of the skillet, or invert it onto a plate. If doing the latter, be sure to use oven mitts as the handle will still be very hot!! Again, you won’t want to tackle this recipe on the school morning, but it stores well for several days in a Tupperware. I recommend making it on a weekend and enjoying it that morning, then letting the remainder cool completely and slicing it into individual servings, which can easily be heated in the microwave.
Here are a couple of our family's favorite frittatas:
Chicken sausage, bell pepper, tomato and Trader Joe’s Quattro Fromaggio cheese;
Spinach, mushroom and Feta;
Broccoli and cheddar;
Roasted red pepper, artichoke and goat cheese


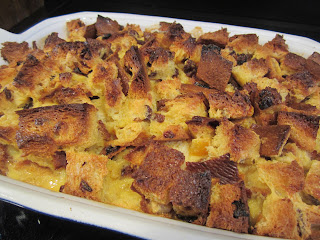
And last but not least, for those who might like to keep a hearty, comforting casserole on hand, a Strata is another great make-ahead breakfast to serve on busy school mornings. Again, I'd recommend making it over the weekend, then slicing it into individual servings that can easily be warmed in the oven or microwave:

Basic Strata

5-6 cups bread, chopped into 1” cubes
(your choice of sourdough, whole wheat, English muffins, etc…even better if it is slightly dried out/stale as it will soak up the eggs more readily) 4 cups of your choice of vegetables (onions, mushrooms, zucchini, spinach, tomatoes, peppers, etc.) and/or meat (ham, chicken sausage, bacon, etc)12 eggs
3 cups of milk
1 Tablespoon Dijon mustard
1 ½ cups grated cheese
(your choice: Parmesan, cheddar, etc.)
Lightly butter, oil or spray the bottom of a baking pan (9x13). Line the bottom of the pan with the chopped bread. Sauté the vegetables and/or meat in a bit of olive oil until tender, then layer on top of the bread. In a separate mixing bowl, beat the eggs, milk, and mustard then pour the egg mixture over the veggies/meat. Top with shredded cheese. Cover, and refrigerate for at least 2 hours, or as long as 2 days at this point. When ready to bake it, preheat oven to 350. Bake the strata, uncovered, until puffed, lightly browned and set in the center, approximately 50 to 65 minutes. Let cool for about 5 minutes before serving, then package up the remainder in a Tupperware to serve throughout the busy week ahead.

(Thank you to Land o Lakes for this strata photo, which I will replace shortly with my own.)

Sunday, August 23, 2009

"If no one's in the kitchen, who's to see?"

Last night I got to see the movie "Julie and Julia". While I attempted twice to read the book, Julia and Julia, I could never get through the first chapter. But the movie was fun. (Shocking, I know, that I would love a movie about food and/or Julia Child…) Afterwards, we went to local French place, Bistro 44, because what other kind of food would you crave after a movie like that? The chef/owner, Alain, cooked a scrumptious dinner for our out of town guests one of the nights leading up to Jeff and my wedding celebration—wow, was that really that many years ago? Anyway, Alain still has his way with food, and the Bordeaux, escargot, halibut in lobster sauce (with a side of pommes frites, of course) and floating island were a perfect way to end a night of babysitting.

If any of you are caught up in the Julia wave these days, I highly recommend “Appetite for Life – The Biography of Julia Child”. In addition to being a phenomenal cook, the background of how Julia got to be this icon of fine food is so interesting...particularly since Julia didn’t even start cooking until she was 40 and her TV career didn’t take off until she was in her fifties! So, for all you moms wondering what to do when your little ones head off to school, imagine all of the possibilities for your second career!

Thursday, August 20, 2009

Cowboy Caviar

Here’s an appetizer idea for everyone gearing up for Labor Day weekend get-togethers. It was originally from our family friend, Gitti, who passed it along to my mom, who passed it along to me. Isn’t that the way most of the best recipes make it into our homes? It’s very simple to make, and a nice alternative to guacamole. Tonight, my mom and I are bringing it to the Wood River Valley Women’s Charitable Foundation’s Margarita Mixer. (I encourage my mom and women friends to read about the organization, as it’s a great concept that does so much good locally…)

Cowboy Caviar

15 oz can black eyed peas, rinsed and drained
15 oz can show peg corn, rinsed and drained
2 avocados, finely chopped
½ cup tomatoes, finely chopped
1 bunch of green onions, white parts finely chopped
1 bunch cilantro, leaves rough chopped

Then for the dressing, in a blender or separate bowl you combine:

¼ cup olive oil
½ cup red wine vinegar
2 cloves of garlic, minced
1 tsp of cumin
dash of salt and pepper

Combine everything and serve with the tortilla chips that are shaped like mini bowls. Ole!

Note: that’s the original recipe above, but we realized we didn’t have red wine vinegar so I mixed half cider vinegar and half white wine vinegar this go round. Equally delicious. Also, for color, I think I’d add ½ a can to 1 full can of black beans. It’s scrumptious as is, but this addition would make it more colorful and would also add fiber and additional texture. So, if you have them on hand, toss them in too.

Tuesday, August 18, 2009

We've Arrived

We made it, after a brutal (understatement) day of travel that involved 4 airports and too many mechanical problems, delays, and standby experiences for one mom trying to stay sane traveling solo with little ones. During this adventure, my children's three meals were mainly peanuts, Biscoff cookies and cranberry juice. They didn't complain, but it's no wonder they were both clamoring for Meme's oatmeal this morning. Then again, they usually inhale the stuff. What is it that makes her oatmeal so much better than mine? While I am out West I'll be sure to have Meme share some of her cooking methods and recipes so I can share them with you. But right now I need to see if Delta has located our baggage...


Sunday, August 16, 2009

On the road again!

I might be posting a little less frequently these next couple weeks, as I will be out West visiting my family. My goal is to be preoccupied with my parents, hiking, biking, reading and dinners out. But with the next school year just around the corner, I had hoped to post some easy make-ahead breakfast recipes, as well as some healthy snack and lunch ideas, before I departed. Instead we spent the better part of today cleaning a thin layer of Aquaphor off of every surface in our little one’s room after he poached the econo size bucket off his changing table and managed to unscrew the lid during his “afternoon nap”...don’t even get my started. Anyway, maybe with two extra sets of hands I’ll still have a chance to get you those recipes/ideas before the school year starts!

Saturday, August 15, 2009

The Perfect Family Vacation (again)

Tyler Place. Just saying it makes me smile. This was our third year at the Vermont family camp, and each year it gets better (if that was possible?). My children frolic around with their camp groups, while Jeff and I have a chance to truly relax knowing they are both under expert care—and having a ball.

As a mom, when my kids are happy, I am happy. It’s a simple equation for me.

It helps that camp is not an option, it’s what all of the kids at Tyler Place do (and very, very happily). When we've visited other resorts that have optional children's activities I have been known to do the "mommy martyr" gig, and only send them a little bit while I spend my vacation, um well, not really on vacation. Oh, and did I mention that the children's camp groups include dining with their peers each day? (While you all know I place a lot of value on family meals, I also think every parent needs a break from then every once in a while. The fact that I can eat 3 meals a day for 7 days in a row, with my only responsibility/decision being whether or not I'll have another helping of dessert is an extra bonus.)

The first morning back, I packed up my littlest one’s requisite gear for story time, gymnastics, the wading pool, and a gold rush treasure hunt and my older one’s backpack for his camp group’s time doing gymnastics, the lake trampoline, a pontoon cruise and pool/splash pad time. I knew I’d be getting two happy, tuckered out kids back—especially since all of that was happening the first day, before pick-up at 1:30pm! (And what you wonder were we doing while the kids were at camp? Well, I’d wanted to try out a Nei Kung class, but instead joined the group of parents tackling the climbing wall. One trip up was enough for me, thank you very much. So, I retreated to an Adirondack chair and read the newspaper cover to cover, without interruption. Jeff opted for a round robin tennis scramble. Then we met for a relaxing lunch before picking up the kids.)

The children’s camps go from 8:30am-1:30pm, and then again from 5:30-8:30pm daily. (Should you have an infant, as we did the first two years, you are given a one-on-one Mother’s Helper for the same hours above but this delightful caregiver can adhere to your baby’s sleeping/feeding schedule back at your cabin, in addition to taking the baby for walks and the wonderful age-appropriate playhouse.)

Families enjoy an afternoon activity together, and offerings include everything from pony rides to farm visits, art classes and fishing trips to nature walks—or they can just enjoy the swimming pool, kayaks, paddle boats, sailboats, playgrounds…unless the excitement of the morning wears them out, and they need a little siesta, as our children still do.

Cocktail hour starts right after the evening camp drop-off (again, for all children so there’s absolutely no “mommy guilt” involved). Sometimes from our perch on the deck, we’d spot the kids romping down the giant lawn down to the lake for a campfire, a BBQ, or scavenger hunt. Other nights, we’d have to wait to pick them up to hear about the gnome dwelling they built, the marionette show they got to see, or the hayride they took. All the while, we were having relaxing evenings with new friends and ones from years past.

A side note: The Rachel Ray Show was filming an episode about vacation destinations the first night we were there, which I think is due to air this winter. So, if you’re thinking about a Tyler Place vacation for your family I’d definitely contact them before the show airs!

Thursday, August 13, 2009

Easy Enchiladas Verdes

I made a batch of my chicken enchiladas last night, with some slight changes (based upon what I had in my pantry/fridge). They were equally delicious. I cooked the filling while the kids were in the kitchen with me (underfoot) and then they baked when the kids were in the tub and having bedtime stories. The filling below made a 9x12 inch tray, an 8x8 tray to give to a friend who just had a baby, and a smaller serving that I’ll leave in the freezer so my husband doesn’t starve when I head West with the kids!

24 Corn tortillas
2 cans Enchilada Sauce (I used Hatch Salsa Verde this time)
2 jars Trader Joe’s Bruschetta (optional, see below)
Shredded Cheese(s) (I used a mix of cheddar and TJ’s 4 Cheese Blend and it was delish)
1-2 bell pepper(s), chopped
1 onion, diced
1 rotisserie chicken, meat removed/shredded by hand
1 lb fresh tomatoes, chopped
2 jars Trader Joe’s Salsa Verde
1 brick low-fat cream cheese
2 cans black beans, rinsed and drained
Jalapenos (optional, for the top)

In a large pan, sauté the onion and pepper in olive oil then add the shredded chicken, tomatoes, cream cheese (which will melt), add the two jars of salsa, and the black beans. Stir to combine. Pour a bit of the Enchilada Sauce in the bottom of your pans. Then fill each tortilla with a hearty scoop of the filling, roll edges under and put them alongside one another in the pan(s). As I mentioned in my earlier post, I don’t worry if the tortillas crack or do all sort of popping up in the process because they are going to be covered in copious amounts of sauce. Pour sauce over the enchiladas, sprinkle with cheese, add the jalapenos (if you’re a fan of extra heat). Special note: I figured my girlfriend who just had her baby might not want too spicy a meal. So, for theirs, I did ½ Hatch Enchilada Sauce and ½ Trader Joe’s Bruschetta (which is basically salsa, without the heat). So, if you prefer a milder enchilada this is one way to cut the spiciness. Once you’ve got your sauce and cheese on, then simply pop the pans into a 350 degree oven until heated through and cheese is lightly browned (about 45 minutes or so). It’s hard to overcook these enchiladas, so don’t worry if you get asked to read one more story.

Extra bonus: these freeze beautifully for up to 2 months.

Wednesday, August 12, 2009

Giada's Grilled Chicken with Basil Dressing

Our Wednesday Supper Exchange is on hiatus during August, but just thinking of how great that concept has been, I whipped up one of my favorite meals I received from fellow mom, Christine, a couple weeks back. She'd cooked Giada De Laurentis' Grilled Chicken with Basil Dressing and it was so good that I have made it several times since that delicious supper swap. Here's the link to the recipe, and I will also quickly walk you through a couple of tips if you'd like them.

The "dressing" (shown before and after in the blender) is akin to a thin, really tangy pesto. It's loaded with lemon flavor and is this vibrant green. In addition to being wonderful on the grilled chicken, it is equally delicious drizzled over grilled veggies or stirred into a quinoa or couscous salad so save any leftovers (in the fridge for several days).

For the chicken, the recipe calls for 6 breasts but I did it with half as many making dinner for 4+ lunch for my husband to take to work the next day since like to pound my chicken really thin (a technique learned from my mom). Simply put chicken breasts between two pieces of wax paper, and then pound it with (the bottom of) a pan (or other heavy object) until 1/2 inch thick. There! Your own chicken cutlets! (For older children, this is a great way to get them involved...)

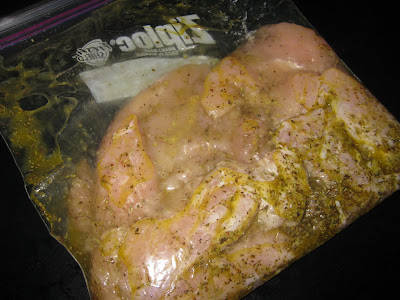
When marinating meat or fish, I usually toss everything in a gallon zip-loc bag. Easy to store in the fridge, and makes clean-up simple (toss it).

Success. Dinner was quick to make and so pretty for a summer supper...

and my lucky (if I might say so myself) husband had a healthy lunch to enjoy the next day.

Tuesday, August 11, 2009

Roasted Shrimp with Tomatoes & Feta

On the heels of tonight’s sad discovery that our tomato plant has also succumbed to late blight, I am wary to share this recipe with you. But then again, it was too quick and delicious not to. You’ll probably have to make it with conventional (versus organic) tomatoes if you are in the Northeast. (The tomatoes I used, above, were from Trader Joe's.) Even then, the price of tomatoes may preclude you from making this meal this summer, so tuck it away for next season if you’d prefer.

Roasted Shrimp with Tomatoes and Feta

This dinner is super quick to assemble and then pop in the oven to do it’s thing, but I must admit that it is not kid-approved at our house, since neither of my children will touch shrimp. If you have the same pickiness over at your place, just whip it up for you and your lucky spouse.

Preheat oven to 350 degrees. In a roasting pan, combine:

Olive oil
2 pints cherry tomatoes, red or multi-colored/heirloom
1 red and 1 yellow pepper, roughly chopped
Garlic, chopped (I put about 4 cloves in)
Zest and juice of 1 lemon
1 tub of Feta
1 handful of shredded parmesan
1-2 lbs of frozen peeled shrimp (still frozen)
As you'll see in the photos above, I simply chopped the garlic and bell peppers, zested and juiced a lemon, tossed in the washed tomatoes, drizzled everything with olive oil and then stirred in the Feta, parmesan and frozen shrimp before popping it in the oven. So easy!! My kind of meal.

Normally shrimp cook very quickly, but because the shrimp are frozen, you've gained quite a bit of cook time....enough time for the garlic, tomatoes and peppers to roast and the flavors to meld. I did stir the whole thing two times during cooking because you want to make sure it's cooking evenly. Once the shrimp are pink (and your kitchen smells amazing), take it out and....

dinner is ready! Serve over brown rice, or with a loaf of crusty bread…the olive oil, melted Feta, parmesan, and liquid from the tomatoes and shrimp create this heavenly dipping sauce.

Late Blight Hits Us Too

In Sunday’s New York Times Week in Review section, Dan Barber of Blue Hill at Stone Barns wrote a lengthy op-ed piece about late blight as it pertains to tomatoes, which included our role as home gardeners. What a shame I thought as I read the article, glad that I had purchased our little plant from a reputable organic farmer at our local farmer’s market. Then tonight, I told the kids they could harvest their little bounty off our tomato plant on the patio and lo and behold, we’ve been struck as well. Bummer. The article hits home. Our tomatoes aren’t ruined—yet, but only some look appetizing. And so, it is a little ironic that the next recipe I was going to share with you was meant to take advantage of all of the plentiful tomatoes around in August. I’ll share it anyway, but maybe you’d prefer to tuck it away for next summer.

Monday, August 10, 2009

Clafoutis (Simple & So Yummy)


Ahhh, a week of family camp where all meals were made for me, and no children are allowed in the dining room. Bliss. (More on family camp later.) But as I was enjoying the food, thoughts of my kids would pop into my head so on more than one occasion, I did abscond with a treat or two to give them back at our cabin. One that was a particular hit with my little one was raspberry clafoutis. And so, when both of my boys announced today that “they’re tiiiiiiired of fresh berries” and refused to pop another into their mouths, I decided to whip up something that would put the two ripe pints I had to good use. And you better believe they are back to eating berries.

Clafoutis is a baked custard that can be made with any berry or stone fruit. It’s very simple to make, and would be equally delicious for breakfast/brunch as it is for dessert. Today I tried two different recipes, Julia Child’s (which involved more effort) and my take on one I pulled off the internet ages ago and then have tucked in my dessert binder. Because I am a fan of any delicious meal or treat that can be made quickly, and then nestled away to bake so I can get on with the (bazillion) other things I have going on, I am going to pass along the simpler one. Should you want Julia’s recipe (in honor of the movie), you may click here.

Blueberry Clafoutis

Butter (to rub on your baking pan)
1 pint of blueberries
4 eggs
1 cup of sugar (though you could use less, Julia's recipe calls for 2/3 cup)
1 cup of milk (preferably whole)
Vanilla (I always use more than a recipe calls for…BIG splash)
Cinnamon (optional, I forgot it today but 1 teaspoon was in my orig recipe)
¾ cup of all-purpose flour
Pinch of salt
Powdered sugar (for dusting after it comes out of the oven)

Preheat the oven to 350. Butter your baking dish (I used a deep pie plate). Sprinkle the berries into the pie plate. Then, in a blender combine the eggs, sugar, milk, vanilla, cinnamon (if you remember it…come to think of it, lemon zest might be a nice addition too next time), flour and salt. Blend until combined. Pour over the berries (which will float to the top). Bake for 45 minutes, or until golden brown and center is set. Let cool slightly before slicing and sprinkling with powdered sugar.

Sunday, August 9, 2009

Great Minds Think Alike

I didn’t get the call from The Food Network. Rest assured that while I may have acted all cool, calm and collected the first four days of our vacation I was totally anxious for my cell phone to ring. I’d worked my tail off to complete the massive application, filled with mini essays ranging from a couple of my original culinary tips to “what ingredient would you be” to “what was the most difficult time in your life”. Friends read it, offered suggestions and I improved it to the point that I was truly proud of what I was handing in. I couldn’t find two recent photos of me (since I am always the one taking the photos), so I handed in a smashing one from the last time Jeff and I went away solo (where I looked radiant) and one surrounded by my little ones who were two years younger than they are today. When I stood in line at the big NYC open audition I felt confident of my background and what I have to offer. So, after my allotted three minute Q&A on: who I am, my culinary background and why I want my own Food Network show, I went on my merry way, pretty confident that I had a great shot at being The Next Food Network Star. I mean, who wouldn’t want a show aimed at busy moms that taught techniques for family-friendly dinners where the ingredients can be flexible (particularly useful if your kid has had a meltdown in Aisle 2), assembly is quick, and most of the meals can be prepared ahead of time (passing along the knowledge garnered from my personal chef business)?

What I didn’t know when I pitched myself as their new “it” girl is that they’d already chosen the winner for the current season. The finale, which had taped well in advance, was going to air two days later. I sat across the table, so hopeful. But I didn’t have a crystal ball. The winner of the current season, Melissa d’Arabian, is also a warm, personable, friendly mom of little ones…with an MBA…who left the corporate world to follow her passion for food and cooking…who genuinely loves to see the “a ha” moment when she passes a cooking tip along to her fellow mom friends…and her recipes are quick, flexible and family-friendly. Her winning show, which debuted today, will teach you to cook for 4 for $10. She’s polished, but not slick. She is friendly, and real. It’s like having your friend pass along some of her culinary tricks and meal ideas.

One way to look at it: I am one season too late and I spent a lot of time and energy working towards a show aimed at moms, which the casting crew knew was a goldmine...and they’d found their gal long before I auditioned in NYC.

The flip side: the Food Network folks see the potential in this “busy mom” market, and while Melissa and I are pretty darn similar on paper, I still think there’s room for one more mom filled with knowledge, an appreciation for what is realistic when it comes to mealtime, and who likes to share these ideas with her friends…and their friends…and their friends. So, I am not giving up. Instead, I am going to relish another year of the stay-at-home-mom gig while my little ones are still little; I will continue The “Full Plate” Blog; and for those who would like some hands-on help, I’m aiming to launch my cooking lessons once the mayhem of the start of the school year lulls a bit.

Let’s let someone totally different—like someone who really knows their “localvore” knowledge and can present it in an attainable, sensible manner to folks across the country-- win this season. And by the time they cast for Season 7, I will have shared my knowledge with all of you for one more year and maybe they’ll be looking for a mom a lot like me. So, until then, I go back to the “mom-a-licious” mantra from when the blog started, where I mention I am try to do it all, and do it well. In addition to making homemade meals for my family, I want to raise happy, kind, confident children; be an interesting and interested wife; get back into shape; see my friends; volunteer in my community and children’s schools; stay abreast of what’s going on in the world; and stay grounded.