
The weather is getting a little chilly, the skies are getting a little gray, the Christmas decorations are popping up in local merchants windows… it’s hard not to start thinking about Christmas even if it is only mid-November! I know, I know, there’s still the wonderful Thanksgiving holiday in between but I am the kind of person who likes to get a jump start on the holiday prep so I can actually enjoy the festivities when they arrive. So, a couple weeks back, when I was baking Halloween treats for the 1st graders, I made some extra dough and rolled, cut and baked a batch of gingerbread cookies that I could freeze until Christmas time. No matter what else I decide to bake, I always make these Gingerbread Cookies. I hope you like this recipe as much as I do!
Gingerbread Cookies
Slightly adapted from a recipe by Rick Rodgers, Christmas 101
Makes 6 dozen cookies
(I often double this recipe so I have tons to share with friends!)
6 cups all-purpose flour
2 teaspoons baking soda
2 teaspoons cinnamon
2 teaspoons ginger
1 teaspoon allspice
1 teaspoon cloves
1 teaspoon salt
½ teaspoon of freshly ground pepper
2 sticks of butter, room temp
½ cup of shortening, room temp
1 cup of dark brown sugar
1 1/3 cup unsulfured molasses
2 eggs
The dough must be made at least 3 hours ahead of time, and can be made up to 2 days ahead of time. So, keep this in mind when planning your baking project.
Combine dry ingredients in a bowl (flour through pepper). Set aside.
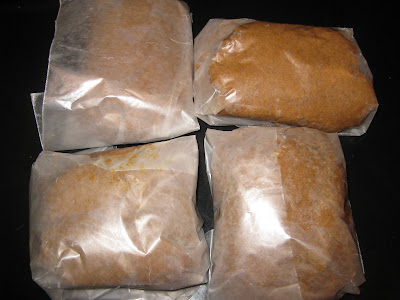
In a large bowl, cream the butter and shortening, then add the brown sugar, molasses and eggs. Once combined, mix in the flour mixture until everything is combined in a stiff dough. Divide the dough into 4 disks, wrap each in wax paper and refrigerate until chilled (at least 3 hours and up to 2 days).
When you’re ready to do the cutting and baking, preheat your oven to 350 degrees. To roll out the cookies, use one disk at a time leaving the others in the fridge. Roll the dough out on a floured surface, cut with a cookie cutter of your choice and I bake them on a parchment lined baking sheet (lessens clean up, and they’ll never stick). Bake 10-12 minutes, let the cookies cool on the sheet 2 minutes, and then transfer them to wire cooling racks.
These cookies will keep up to 1 week in an air-tight container on the counter, and up to 3 months in an air-tight container in the freezer.


what frosting do you use?
ReplyDeleteI use Royal Icing, made with powdered egg whites, confectioners' sugar and water. Let me see, the ratio I use is:
ReplyDelete4 cups powdered sugar
3 tablespoons meringue (egg white) powder
1/2 teaspoon vanilla or lemon extract
1/2 - 3/4 cup warm water (add the water until desired consistency)
Royal icing needs to be used immediately or stored in an airtight container as it hardens quickly when exposed to air!
Forgot to mention, I color the Royal Icing with food coloring, or you can use the gels. So, since that's another liquid, add that before you finish adding the water as food coloring will also moisten the frosting...
ReplyDeletethanks. last year we used both butter cream frosting and cream cheese frosting, easy for the kids to pile on (and did they ever)! i think they are ready for the challenge of royal icing....
ReplyDeleteYou may already know this, but a trick I use with my kids is to put a hefty scoop of Royal Icing in a zip loc baggie. Then, I'll trim a very small hole in one corner, and let them use that as a pastry bag.
ReplyDeleteyes, we are getting the ziplock bags ready to go for our handprint turkey cookies. my younger one likes to pile and "smooth" the frosting with a plastic knife. i am hoping the older one will decorate the cookies i need for a cookie exchange! will let you know how it goes. thanks!
ReplyDelete